Guide to WhoIS
Guide to WhoIS
We prepared a detailed guide how to add your contact details to whois.cuni.cz and therefore also on the fsv.cuni.cz website where the contacts are going to be automatically mirrored.
Steps
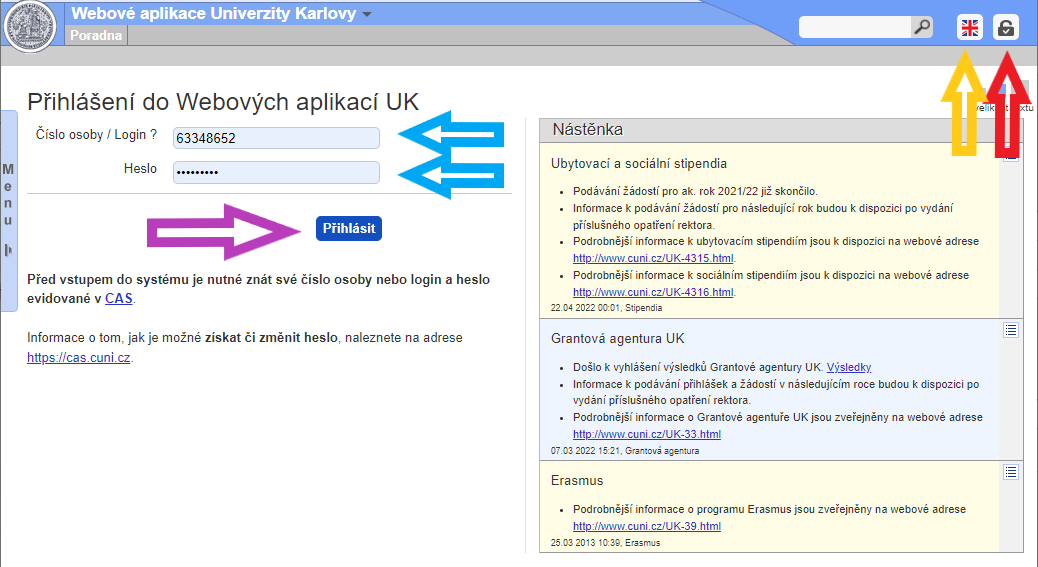
1. To log into the WhoIS, use the link whois.cuni.cz. Here, click on the login option (see the red arrow).
2. To switch to English, click on the British flag in the right upper corner (next to the login icon; see the yellow arrow).
3. Fill in the login and password. They are the same as the CAS and SIS login (see the blue arrows).
4. Once you fill in the login and password, click on the login icon (see the purple arrow).
Screen 1
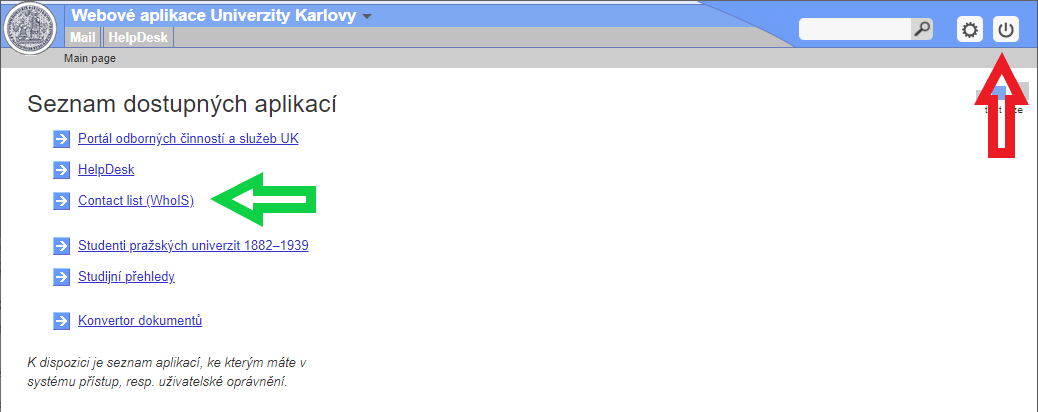
5. After logging in, you will get to the opening menu. Select "Contact list (WhoIS)" (see the green arrow).
6. Please note the log out icon, where the icon changed after logging in (see the red arrow)
Screen 2
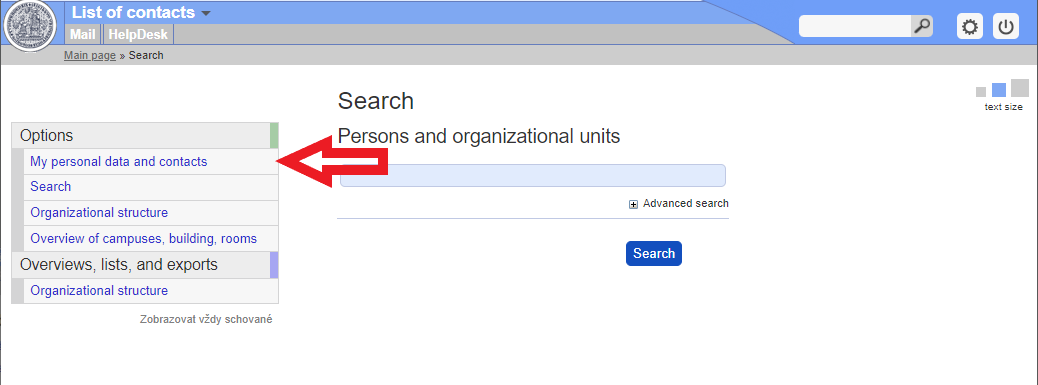
7. After clicking on the contact list, you will get the list of options where you have to choose "My personal data and contacts" (see the red arrow).
Screen 3
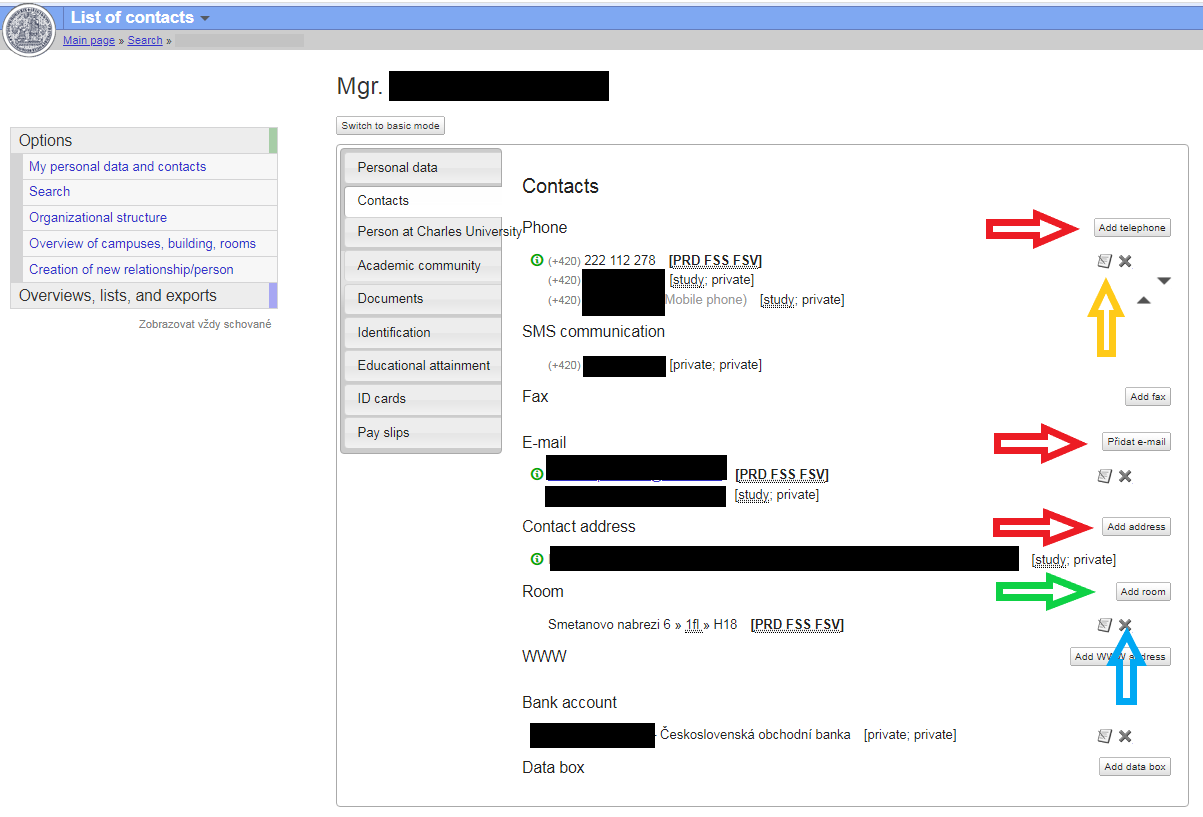
8. Choose "Contacts".
9. Fill in the Phone, Email and Contact Address (see the red arrow).
10. If you already have some data in your contacts, you want to correct them and you have the option to edit (see the yellow arrow), then you can do it yourselves.
11. If you do not have the option to edit (or to delete - see the blue arrow), add a new contact and ask the head of your department or the secretary of the institute to delete the wrong contact.
12. The abovementioned supervisors have rights to correct contacts, but if they create them, the user themselves will not have access to edit or delete - so it is important that the contacts are filled in by the users themselves.
13. What only heads of departments and secretaries of institutes can do is to set the column "Room", (see the green arrow) which users themselves cannot fill in or edit.
Screen 4
14. The head of the department or the institute secretary (not the user) will then fill the information about the room where the user works.
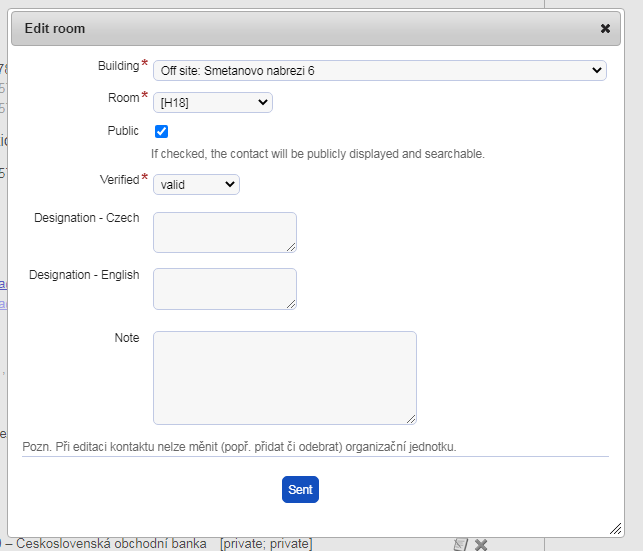
Screen 5
15. If the manager does not have the option to set the room, he calls or writes an email to the FSV UK IT department to the WhoIS role administrator (it_hollar@fsv.cuni.cz).
16. The procedure for a manager to find the room setting option in WhoIS is as follows (this is not set by the user):
- Go to whois.cuni.cz
- Log in with your CAS login and password (see the step 3.)
- Follow steps 5 and 6, and in step 7 either select the "Search" option or write directly in the search box the ID number of the employee in question, or at least their first and last name (with the first and last name, be careful about duplicities, the ID number is more accurate in determining who you're actually looking for.)
- When you find the employee in question, click on their name and then select "Contacts" under their name and fill in the room.
- If a room is already listed and you want to edit the room, then select the edit icon similar to Screen 4, yellow arrow.
- Otherwise, use the "Add room" option as in the step 13 (Screen 4, green arrow)
- Finally, close WhoIS with a button similar to step 6 (Screen 2, red arrow).
17. When editing contacts, the user must take care to add them correctly. For example, the option "Add phone", "Add email" or "Add address" is shown in Screen 6.
18. You first fill in the data marked with a red asterisk (see the blue arrow) and indicate whether the contact should be public - visible as a result also on the FSV UK website (see the red arrow).
19. After carefully filling in the required fields marked with an asterisk, think about whether you want to fill in the optional data as well.
20. Finally, click on the "Send" icon (see the green arrow).
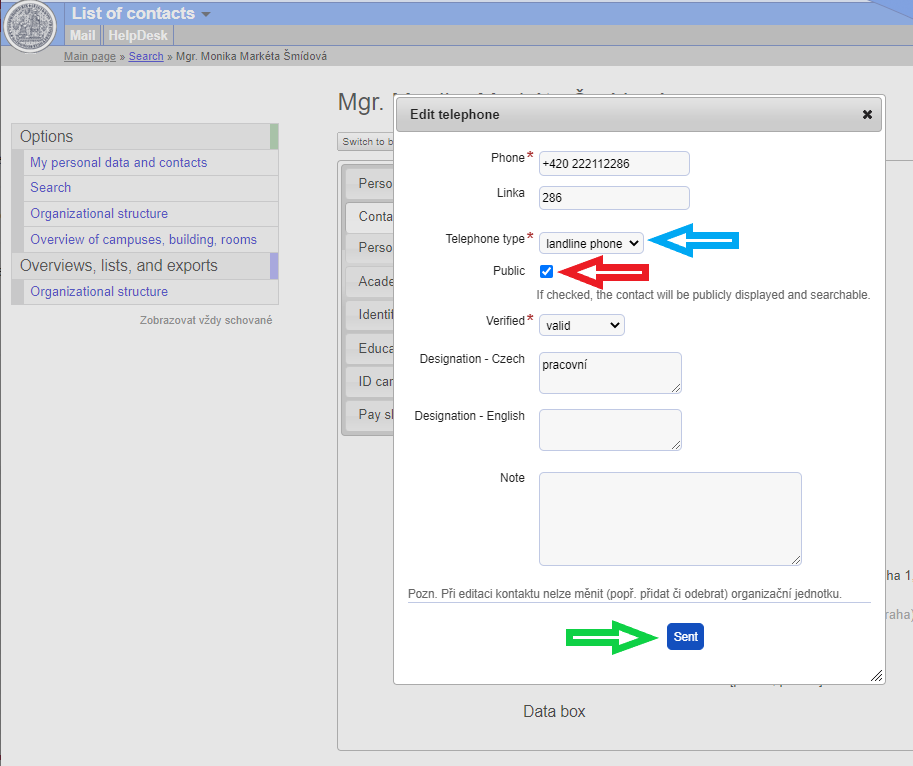
Screen 6
21. These changes in WhoIS won't become apparent on the FSV UK website immediately. It will take several hours.
22. Now the FSV UK employee will have their contact filled in in his profile at fsv.cuni.cz.
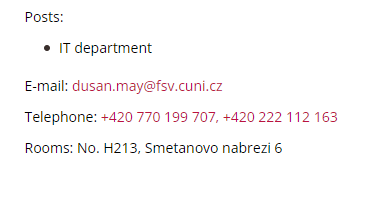
Screen 7